Introduction
Crochet a hat – Crocheting is a timeless and enjoyable craft that has been passed down through generations. One of the most rewarding projects for beginners is crocheting a hat – not only is it practical, but it also allows you to explore various stitches and techniques while creating something you can wear with pride. In this beginner’s guide, we’ll walk you step by step through the process of crocheting your first hat, from selecting materials to weaving in the ends.
Gather Your Materials
Before you begin, ensure you have the following basic supplies:
- Yarn: Choose a medium-weight (worsted) yarn for your first project, as it’s easy to work with and shows stitch definition well. Acrylic yarn is a popular choice for beginners due to its affordability and washability.
- Crochet Hook: The size of the hook will depend on the yarn you choose. Check the yarn label for recommended hook sizes. For worsted weight yarn, a size H (5.0mm) or I (5.5mm) hook is common.
- Scissors: For cutting the yarn.
- Yarn Needle: A large-eyed blunt needle is used for weaving in ends.
- Stitch Marker: Optional but helpful for marking the beginning of rounds.
Learn Basic Stitches
If you’re completely new to crochet, start by mastering these fundamental stitches:
- Chain (ch): The foundation of all crochet projects.
- Single Crochet (sc): A basic stitch that creates a dense fabric.
- Double Crochet (dc): A taller stitch that works up faster and creates a looser fabric.
YouTube tutorials and online guides can provide clear demonstrations of how to make these stitches.
Choose a Pattern
For your first hat, consider starting with a simple beanie pattern. Look for patterns labeled “beginner-friendly,” which often use basic stitches and minimal shaping. Patterns will typically include instructions for different sizes, so measure your head circumference or that of the person you’re making the hat for to select the appropriate size.
Understanding Gauge
Gauge refers to the number of stitches and rows per inch, and it’s crucial for ensuring your finished product fits correctly. Before starting your hat, create a gauge swatch using the suggested hook size and yarn. If your swatch doesn’t match the pattern gauge, adjust your hook size accordingly and try again.
Crocheting the Hat
Starting the Project
- Make a Foundation Chain: Start with a chain that matches the circumference of the hat’s base, according to your pattern. Join the chain with a slip stitch to form a ring, being careful not to twist the chain.
- Round 1: Work the first round of stitches (usually single or double crochet) into the chain, placing a stitch marker in the first stitch to mark the beginning of the round.
Increasing for the Crown
To shape the crown of the hat, you’ll need to increase stitches in each round. Most patterns will specify how many increases to make and where to place them.
Continuing the Body
Once the crown is wide enough, you’ll continue working even (without increasing) until the hat reaches the desired length. This part often involves repeating a set number of stitches per round.
Shaping the Brim
Some patterns may include instructions for creating a brim, such as working a few rounds of half-double crochets or adding a ribbed pattern for elasticity.
Finishing Touches
- Closing the Top: When your hat reaches the desired length, you’ll need to close the top. This could involve gathering the last few stitches together or working a series of decreases until you can pull the remaining stitches tight and secure them off.
- Weaving in Ends: Use your yarn needle to weave in any loose tails of yarn, ensuring they won’t unravel.
Practice and Experiment
Remember, crocheting is a skill that improves with practice. Don’t be discouraged if your first hat isn’t perfect. Each project will teach you something new, and soon you’ll be crocheting hats with confidence and exploring more complex patterns and stitches.
Springtime Breezes: Lightweight Beanies and Sun Hats
As winter fades away and the world comes alive with blooming flowers, lightweight crochet hats become the perfect accessory.
- Lacy Beanies: Use cotton or linen yarn to create lacy, breathable beanies that add a touch of elegance to your spring outfits. Patterns featuring open stitches like the shell stitch or filet crochet allow air to flow through, keeping you comfortable. Pastel colors reflect the season’s soft hues.
- Sun Hats: Wide-brimmed crochet sun hats offer both style and sun protection. Choose a pattern with a tight weave for better coverage or opt for one with an open weave design for a more airy feel. Adding a colorful ribbon or flower detail can elevate the look.
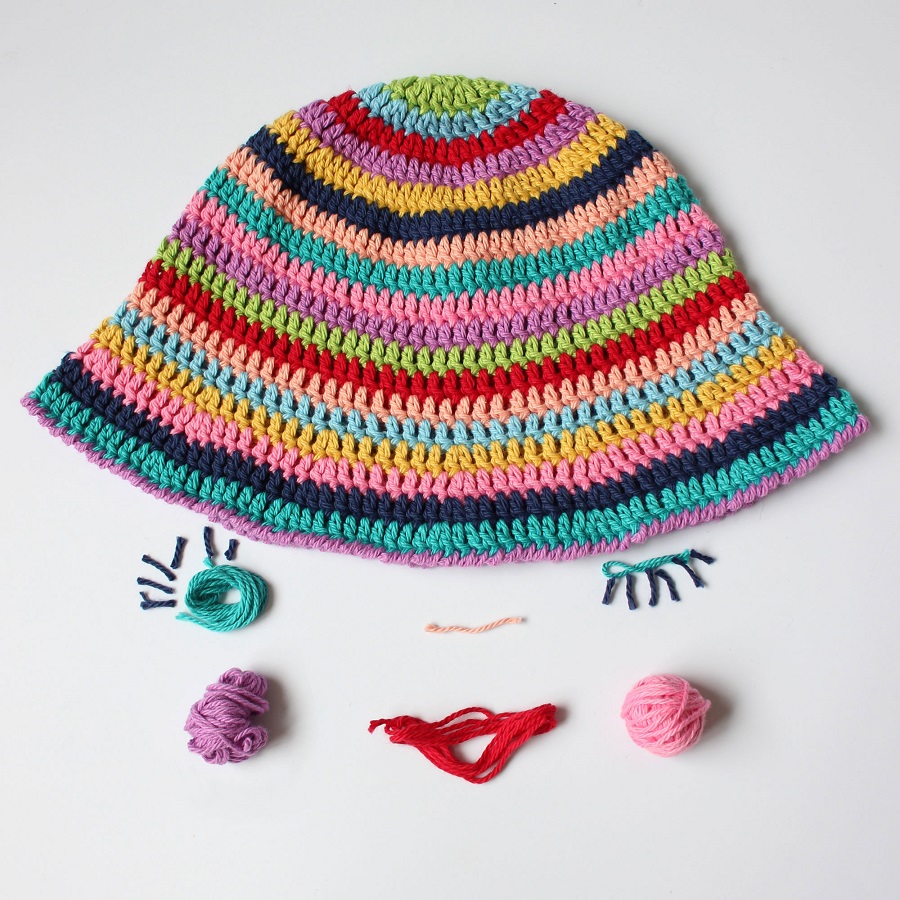
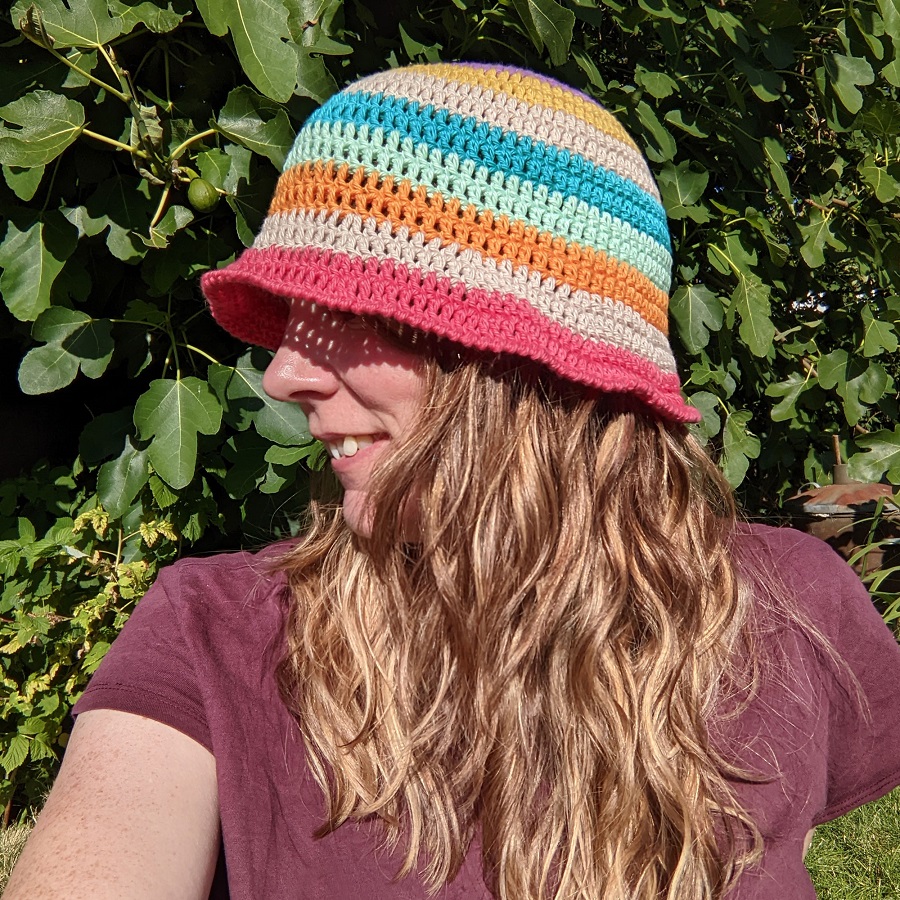
Summer Sizzle: Beachy Floppy Hats and Boho Headbands
Embrace the warmth of summer with crochet hats that serve both fashion and function.
- Floppy Hats: Large-brimmed floppy hats made with cotton yarn are ideal for lazy days at the beach or picnics in the park. They not only shield your face and neck from harmful UV rays but also add a touch of glamour to your summer look. Experiment with stripes or add a pom-pom trim for a playful twist.
- Boho Headbands and Ear Warmers: For those who prefer a lighter option, crochet headbands adorned with beads, tassels, or crochet flowers can be a chic alternative to full hats. These can double as ear warmers during cooler summer evenings or early fall days.
Autumn Elegance: Cozy Slouchy Hats and Berets
As leaves turn golden, switch to warmer materials and deeper hues for your crochet creations.
- Slouchy Beanies: Slouchy hats offer a relaxed yet sophisticated look that pairs perfectly with autumn’s layered outfits. Using wool or alpaca yarn, choose patterns that incorporate cables, twists, or textured stitches for added depth and warmth. Earthy tones like rust, olive, and mustard yellow are excellent choices.
- Berets: A classic beret adds a touch of Parisian charm to any fall outfit. Crochet patterns for berets often feature a combination of simple stitches and increases to form the signature shape. Pair yours with a cozy sweater and boots for a chic ensemble.
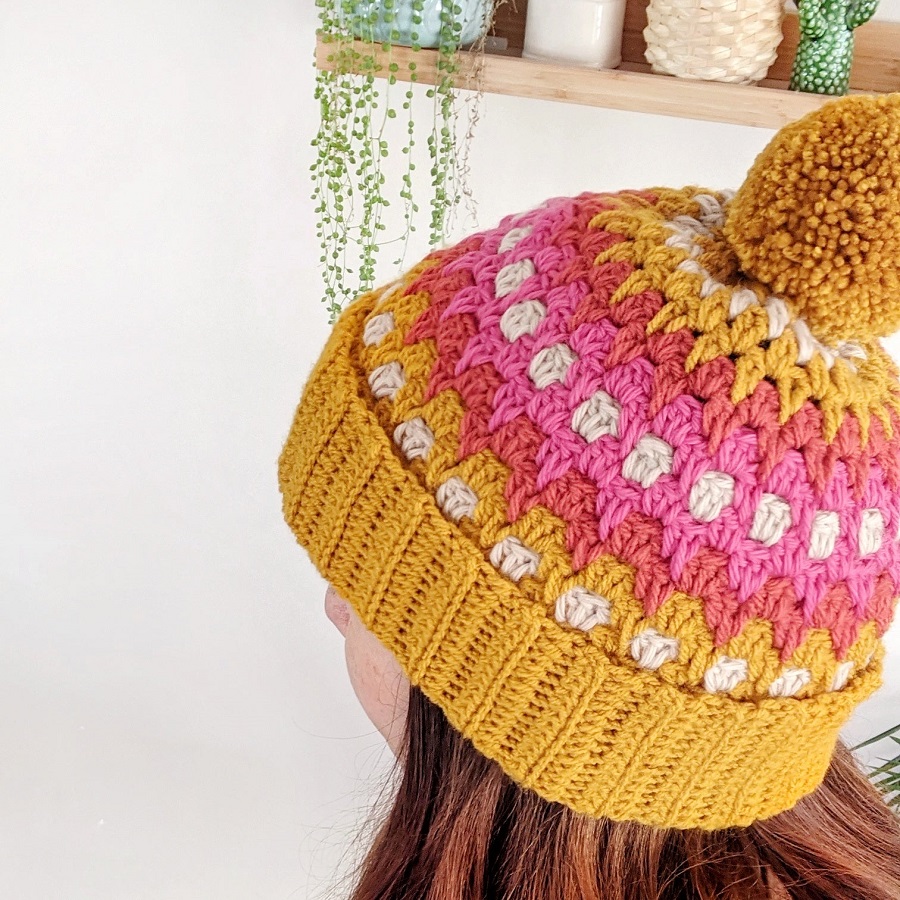
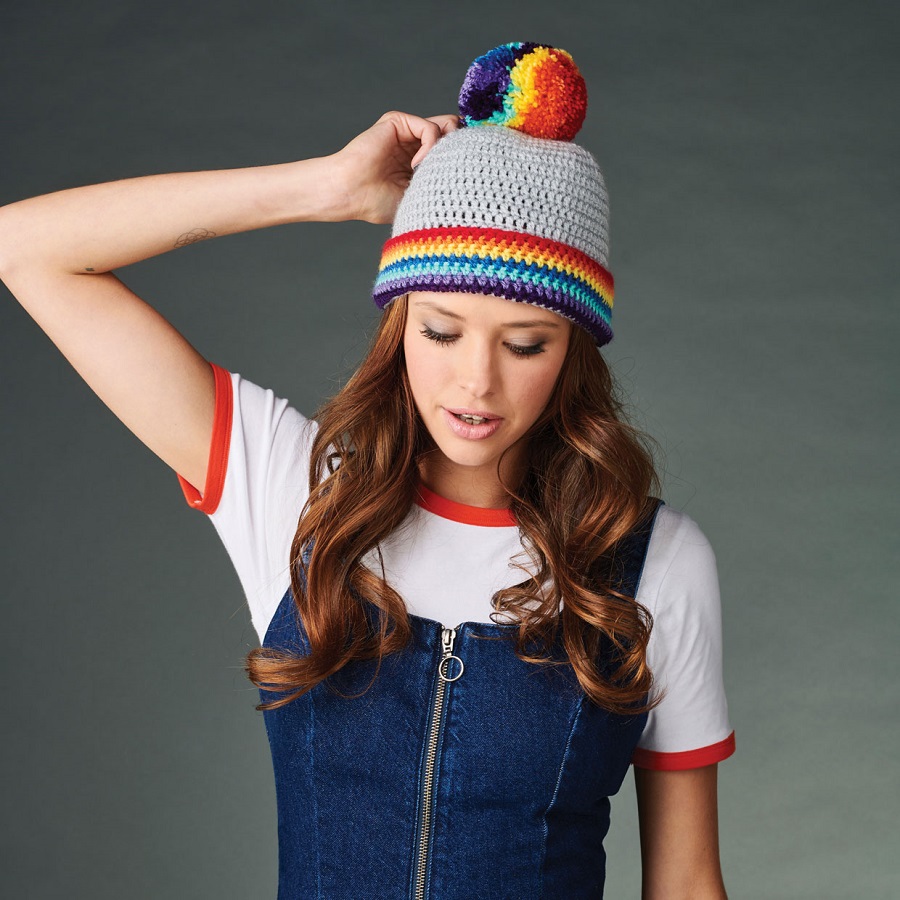
Winter Warmth: Chunky Pom-Pom Beanies and Earflap Hats
When the temperatures drop, crochet hats become essential for warmth and style.
- Chunky Beanies with Pom-Poms: Quick to make and oh-so-cozy, chunky beanies topped with fluffy pom-poms are winter favorites. Bulky yarn and large hooks speed up the process, making these hats ideal for last-minute gifts. Neutral shades or bold colors, paired with matching pom-poms, can brighten up dreary winter days.
- Earflap Hats: Perfect for outdoor activities, earflap hats provide extra warmth around the ears and neck. Playful patterns incorporating braids, tassels, or even animal motifs can make them particularly fun and suitable for children and adults alike.
Tips for Crafting Your Crochet Hats:
- Choose Yarn Wisely: The right yarn can make or break your project. Consider the season, desired warmth, and personal preferences when selecting your material.
- Experiment with Colors and Textures: Don’t be afraid to mix and match colors or try out different textures. This is where your creativity truly shines.
- Customize for Fit: Most patterns offer sizing guidelines, but don’t hesitate to adjust the circumference or height to ensure a perfect fit for yourself or the recipient.
- Accessorize: Adding buttons, ribbons, or绣 can elevate your hat from simple to stunning. Personal touches make each piece unique.
Conclusion
Mastering advanced hat designs and techniques in crochet opens doors to boundless creativity and personal expression. By delving into textured stitches, intricate colorwork, and innovative design elements, you can create hats that are not just functional but also works of art. Remember, practice and patience are key in honing your skills. With each completed project, you’ll not only refine your crochet mastery but also add a touch of handmade charm to your wardrobe or the lives of those you gift them to. So, grab your hook and yarn, and embark on this fulfilling journey of mastering the art of crochet.