Introduction
Crochet is an incredibly versatile craft that allows you to create beautiful and practical items, from scarves to home décor. One fun and unique challenge is crafting your very own crochet cowboy hat! Not only will this project showcase your crochet skills, but it will also result in a stylish accessory that you can wear with pride. In this guide, we’ll provide you with a detailed step-by-step approach to creating your own crochet cowboy hat.
Materials You’ll Need
Before diving into the crafting process, gather the following materials:
Yarn
- Weight: Medium or worsted weight yarn is recommended, as it provides the right thickness and durability for a sturdy hat.
- Color: Choose a color that suits your style! Classic neutral tones like brown or beige, vibrant colors, or even a fun ombre can all work well.
Crochet Hook
- Size: A size H/8 (5 mm) crochet hook is typically recommended for medium weight yarn. Always check the yarn label for the recommended hook size.
Scissors
- For cutting the yarn.
Yarn Needle
- A large-eye yarn needle is helpful for weaving in ends after finishing your project.
Measuring Tape
- Useful for ensuring the hat fits your head size.
Optional Decorations
- Ribbon, beads, or crochet flowers to embellish your cowboy hat.
Basic Crochet Stitches to Know
Before starting, make sure you are familiar with the following crochet stitches:
- Slip Knot: The foundation of your crochet project.
- Chain Stitch (ch): The most basic stitch used to start your work.
- Single Crochet (sc): A simple stitch that works well for creating solid fabric.
- Double Crochet (dc): Adds height and texture to your project, useful for creating the hat’s crown.
- Half Double Crochet (hdc): This stitch is a nice compromise between single and double crochet and can provide a beautiful finish.
Measure Your Head
To create a cowboy hat that fits well, start by measuring the circumference of your head. Use a measuring tape and wrap it around your forehead about an inch above your ears. Note the measurement down; this will help determine how many chains you need to start.
Create the Brim
- Start with a Slip Knot: Begin with a slip knot and make a chain that is about 1-2 inches shorter than your head measurement. For example, if your head measures 22 inches, start by chaining 20 inches.
- First Row: In the second chain from the hook, make a single crochet. Continue to single crochet in each chain across the row. Once you reach the end, chain one and turn your work.
- Building Rows: Continue adding rows of single crochet until the brim reaches the desired width (about 3-5 inches). At the end of each row, chain one and turn.
- Shape the Brim: To add a little flair to the brim, you can create an increasing row by adding an extra stitch in the middle of the row. This will help create a slight curve.
Create the Crown
- Forming the Circle: Once you reach the desired brim width, you will need to start the crown. Join the first row of your brim with a slip stitch to form a circle. This will be the base of the crown.
- Increase Rows: To create the height of the crown, switch to half double crochet or double crochet stitches. Make 2 stitches in every stitch around for the first round to increase the size significantly.
- Continue Building: For the following rounds, alternate between increasing (making two stitches in one stitch) and normal stitching until you reach the desired crown height, usually around 6-8 inches.
Shaping the Hat
- Adding Texture: Once you’ve achieved the height you want, add texture by incorporating different stitches such as front post double crochet or back post double crochet.
- Finishing the Crown: If you desire, you can give the crown a rounded top or a slightly pointy shape. To do this, you can decrease stitches by skipping every third or fourth stitch in the last few rounds.
Finishing Touches
- Weave In Ends: Use your yarn needle to weave in any loose ends left from changing rows or colors. This step is crucial for keeping your hat looking neat.
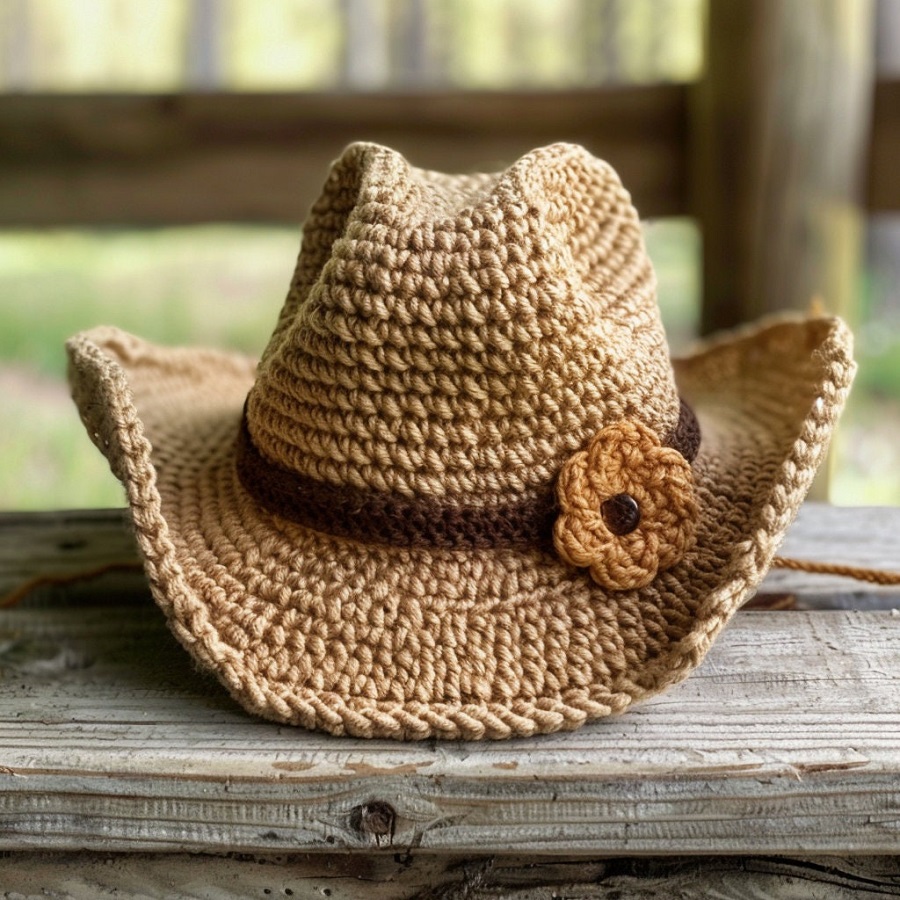
- Adding Embellishments: Now’s the time to decorate your cowboy hat! You can crochet flowers, braid a yarn band around the crown, or attach some decorative beads or ribbons.
- Blocking: To ensure your hat holds its shape, consider wet blocking it. Lightly dampen the hat and shape it to your desired look, then leave it to dry.
Wear and Show Off
Once your crochet cowboy hat is complete and dry, it’s time to wear it! Pair it with casual outfits, or dress it up for a more chic look. The beauty of crafting your own gear is that it’s a unique expression of your style, and nothing beats the satisfaction of making something yourself.

The Allure of Crochet Cowboy Hats
Crochet cowboy hats are distinct from their traditional felt or straw counterparts. They offer versatility in design, allowing crafters to express their creativity while still producing a functional accessory. Whether you’re looking for a hat to protect you from the sun or a statement piece for your next concert or festival, a crochet cowboy hat can be tailored to your personal style.
The Perfect Blend of Style and Functionality
The cowboy hat’s broad brim is not only aesthetically pleasing but practical, providing shade and protecting against the elements. Crochet hats can mimic traditional styles while adding a unique twist through texture, color, and stitch patterns. They can be made in various weights to suit the season: lighter yarns for summer outings and thicker options for cooler months.
Choosing the Right Materials
Before diving into the crochet process, it’s crucial to choose the right materials. The yarn you select will significantly impact the hat’s look, feel, and function. Here’s what to consider:
1. Yarn Types
Cotton Yarn: This is a popular choice for summer hats. It’s breathable, lightweight, and available in a variety of colors. Cotton holds its shape well and is comfortable to wear.
Acrylic Yarn: This synthetic option is budget-friendly and comes in an extensive color palette. It is durable and easy to care for, making it a practical choice for everyday hats.
Wool Yarn: Ideal for cooler weather, wool provides warmth and also has natural moisture-wicking properties. Look for lightweight merino wool for a softer touch.
2. Hook Size
The hook size you select will depend on the yarn weight. For lightweight yarn, consider using a G or H hook, while heavier yarns might require an I or J hook. A larger hook can create a more open stitch, which is perfect for summertime hats.
3. Additional Accessories
Beyond yarn and hooks, consider adding embellishments such as ribbons, beads, or leather bands to give your hat a personal touch. These elements can enhance the Western aesthetic while showcasing your personal flair.
Basic Techniques for Crochet Cowboy Hats
Before we get into the specific pattern, it’s vital to understand some fundamental crochet techniques. If you’re a beginner, you may want to practice the following stitches:
1. Chain Stitch (ch)
This foundational stitch is the building block of most crochet patterns. It’s created by creating loops of yarn with your hook.
2. Single Crochet (sc)
The single crochet stitch creates a tight, sturdy fabric ideal for the body of the hat.
3. Double Crochet (dc)
Double crochet allows for quicker coverage and creates a lighter, more open fabric, which is excellent for the brim.
4. Slip Stitch (sl st)
This stitch is often used to join rounds or create a neat finish.
5. Half Double Crochet (hdc)
A versatile stitch that falls between single and double crochet, offering a nice texture while maintaining durability.
Pattern: Basic Crochet Cowboy Hat
Now that you’re familiar with the materials and techniques, let’s dive into a simple pattern for a classic crochet cowboy hat.
Materials Needed
- 100% cotton or acrylic yarn (medium weight)
- Crochet hook size H (5.0mm)
- Yarn needle
- Scissors
- Measuring tape
Instructions
Crown
- Start with a Slip Knot: Create a slip knot and chain 4.
- Join to Form a Loop: Join with a slip stitch to form a ring.
- Round 1: Chain 3 (counts as first double crochet), then work 11 double crochets into the ring. Join with a slip stitch.
- Round 2: Chain 3, 2 double crochet in next stitch, 1 double crochet in next stitch, repeat from * to * around. Join with a slip stitch.
- Continue Increasing: Repeat similar increases for several rounds until the crown measures about 5 to 6 inches in diameter or your desired size.
Sides
- Start the Sides: Once you reach the desired diameter, crochet in rounds without increasing for about 3 inches to form the sides.
- Change Stitch: You can introduce a decorative stitch pattern here, such as a cluster or shell stitch, to add texture.
Brim
- Creating the Brim: For the brim, chain 1 and create a round of single crochets, then switch to double crochet or any preferred stitch.
- Brim Width: The brim can be as wide as you like—typically, 2 to 3 inches works well.
- Finish Off: Finish with a round of slip stitches for a neat edge. Cut the yarn and pull through the loop to secure it.
Personalizing Your Hat
Once you have your basic cowboy hat, there are countless ways to personalize it:
- Color Choices: Experiment with different colors to match your personality or outfit. Ombre effects can create stunning results.
- Embellishments: Add a leather band adorned with beads or a dried flower bouquet for a rustic flair.
- Stitch Variations: Play with different stitches to create textures, like ribbing or shells, adding character to your design.
Maintenance and Care
To ensure your crochet cowboy hat stays in great shape:
- Cleaning: Hand wash in cold water or spot clean. Avoid hot water, as it can shrink acrylic or cotton.
- Drying: Lay your hat flat to dry; avoid hanging it, as this can distort its shape.
- Storage: Keep your hat in a dry, cool place, ideally in a box to prevent it from crushing.

Conclusion
Creating a crochet cowboy hat is not just about the craft; it’s about celebrating the joy of DIY fashion. The process allows you to infuse your personality, creativity, and skill into a beautifully functional piece of art. With a crochet cowboy hat, you become part of the vibrant tapestry of the Western wear tradition, blending style, functionality, and craftsmanship into a product that tells a story. Whether you’re wearing it out in the sun or just showing it off at home, your handmade crochet cowboy hat is sure to turn heads and inspire others to pick up a hook and yarn. Happy crocheting!
