Essential Materials and Tools for Crocheting a Baby Hat
Before you begin the delightful project of crocheting a baby hat, gathering your materials and tools is key. The right selection not only makes the process smoother but also enhances the outcome of your hand-crafted hat. Let’s delve into what you need.
Yarn: Opt for soft, baby-friendly yarn to ensure comfort. Acrylic, cotton, or bamboo blends are excellent choices. Look for yarn labeled as ‘baby’ as it’s gentle on delicate skin.
Crochet Hook: The hook size determines the stitch size and hat density. Common sizes for baby hats range from 3.5 to 5.5 millimeters. Check your pattern for the specific size recommended.
Scissors: A sharp pair of scissors is crucial for cutting yarn cleanly.
Yarn Needle: Use a yarn or tapestry needle to weave in ends and assemble parts of the hat.
Stitch Markers: These help mark your rounds and are vital for keeping track of your progress, especially for beginners.
Tape Measure: To ensure a perfect fit, use a tape measure for sizing during the process.
Pattern: A clear pattern is your roadmap when learning how to crochet a baby hat. Choose one suitable for beginners if you’re new to this craft.
By preparing these essential materials and tools, you’re setting yourself up for a successful crochet session. In addition, proper preparation helps you get the hang of the process faster. Moreover, it lets you focus more on the joy of creating something special with your hands.
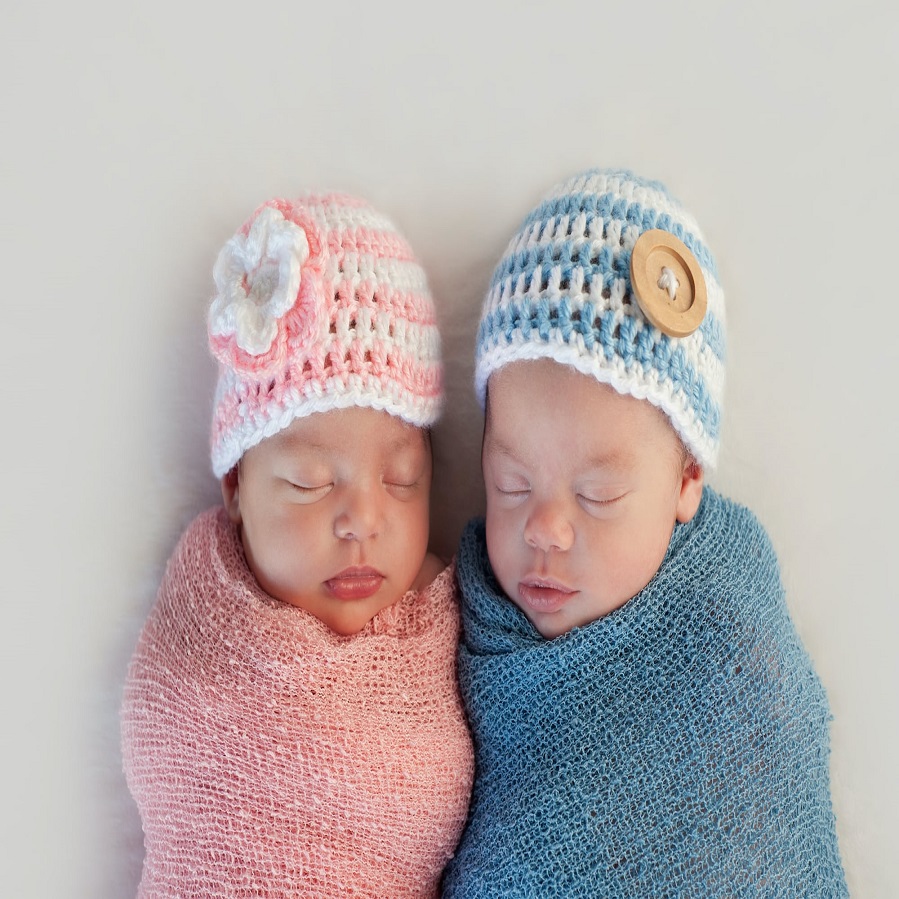
Five week old sleeping boy and girl fraternal twin newborn babies. They are wearing crocheted pink and blue striped hats.
 Choosing the Right Yarn and Hook Size
Choosing the right yarn is crucial for your baby hat project. Soft, baby-friendly yarns like acrylic, cotton, or bamboo blends are ideal. These materials are gentle on a baby’s sensitive skin. Ensure the yarn is labeled ‘baby’ for optimal safety and comfort.
Hook size also affects your project significantly. Typically, baby hats use hooks sized from 3.5 to 5.5 millimeters. This range helps create stitches that are the right size for baby hats – not too tight and not too loose. It’s important to refer to your chosen pattern for the recommended hook size to get the best results.
Using the appropriate yarn and hook size will not only make the crocheting process easier but also ensure the final product is soft, safe, and comfortable for babies. This careful selection contributes significantly to the quality and appearance of your finished baby hat.
Basic Crochet Stitches Used in Baby Hat Patterns
Mastering a few basic crochet stitches is essential for creating a baby hat. Here’s a guide to the most commonly used stitches in baby hat patterns:
Chain Stitch (ch): This is the foundation of most crochet projects. You’ll use it to make the initial loops on your hook.
Slip Stitch (sl st): This stitch is used to join ends together or to move your yarn without adding height.
Single Crochet (sc): Ideal for tight and dense fabric, single crochet provides a smooth and sturdy texture to the baby hat.
Half Double Crochet (hdc): A stitch taller than single crochet, it’s perfect for creating a bit more stretch in your fabric.
Double Crochet (dc): Double crochet offers a softer and airier texture, which makes it perfect for a comfortable baby hat.
Combining these stitches according to your pattern will help you create beautiful textures in your baby hat project. This skill set allows for a variety of designs and styles, ensuring that each hat you crochet is unique and cherished.
Step-by-Step Instructions for Crocheting a Basic Baby Hat
Ready to start your baby hat project? Follow these step-by-step instructions to create a cozy and adorable hat for your little one.
Create a Slip Knot – Begin with a slip knot on your crochet hook. This is your starting point.
Make the Foundation Chain – Crochet a chain that’s long enough to wrap around the baby’s head comfortably. Your pattern will specify the exact number of chains.
Join the Chain – Use a slip stitch to join the ends of your chain, forming a circle. Be careful not to twist the chain.
Start the First Round – Depending on your pattern, begin the first round with single crochet or another stitch. Keep your tension even.
Complete the Rounds – Continue following the pattern, adding rounds until the hat reaches the desired height.
Shape the Crown – If your pattern calls for it, decrease stitches evenly across the top rounds to shape the crown of the hat.
Finish Off – Once the hat is the right size, cut the yarn, leaving a long tail. Pull it through the last loop to secure.
Step 8: Weave in the Ends – Use a yarn needle to weave in any loose ends for a neat finish.
By tackling each step at your own pace, you’ll master ‘how to crochet a baby hat’ in no time. Remember, consistency is crucial, so keep your stitches uniform for the best look. Now you’ve got the basics, let your creativity guide you to add unique touches to your baby hat!
Adding Decorative Elements and Personalization
Once you have the basic structure of a baby hat complete, adding decorative elements and personal touches can turn a simple hat into a treasured keepsake. Here’s how to make your crocheted baby hat stand out:
Choose a Color Theme: Pick colors that suit the baby’s personality or match their outfits. Soft pastels or vibrant hues can both look wonderful.
Incorporate Patterns or Stripes: Use different colored yarns to create patterns or stripes within your crochet rows for a fun effect.
Add Crochet Appliqués: Flowers, animals, or any other shapes can be crocheted separately and then sewn onto the hat to personalize it.
Include Textures: Implement stitches like the bobble or popcorn stitch to add a tactile element that babies will enjoy exploring.
Attach a Pom-Pom or Tassel: A fluffy pom-pom on top of the hat or tassels at the sides can give it an extra playful touch.
Embroider Initials or Names: Carefully embroider the baby’s initials or name onto the hat with a yarn needle for a unique and personalized addition.
Use Ribbons and Buttons: Sew on cute buttons or tie a ribbon around the hat for additional embellishment.
Remember that all additions should be securely attached to prevent them from becoming a choking hazard. Personalizing your crocheted baby hat not only adds charm but also shows the extra love and thought put into your handmade gift.
Tips for Sizing and Ensuring a Perfect Fit
Creating a baby hat that fits perfectly can be challenging. Here are tips to get it right:
Measure the Baby’s Head: Use a tape measure to get the exact circumference of the baby’s head. This number is your main guide.
Refer to Size Charts: Look up standard size charts for baby hats as a reference. However, remember that every baby is unique.
Check Your Gauge: Before starting, crochet a small swatch to check your gauge. Count how many stitches per inch you have and adjust your hook size if needed.
Consider Stretch: Babies grow quickly, so a little stretch in the hat allows for longer use. The right yarn and stitch choice can add stretch.
Try On the Hat: If possible, try the hat on the baby as you go. This helps to ensure a custom fit.
Account for Shrinkage: If your yarn might shrink after washing, make the hat slightly larger to compensate.
Allow for Hair: If the baby has a lot of hair, add a bit more width to accommodate it comfortably.
By taking these measures, you’ll increase the chances of creating a comfy, well-fitted baby hat. Happy crocheting!
Finishing Techniques and Washing Instructions
After you have crocheted your baby hat, proper finishing and care are vital. Here are guidelines to help you.
Weaving in Loose Ends: Use a yarn needle to weave in any stray yarn ends. Secure them well to prevent unraveling.
Blocking: To shape the hat accurately, consider blocking it. Soak the hat in water, gently squeeze out excess, and set it on a flat surface. Shape it as it dries.
Adding a Lining: For extra comfort, sew a soft fabric lining inside the hat. Choose a breathable material like cotton.
Washing Instructions: Wash the baby hat in cold water with a mild detergent. Hand washing is preferable to preserve the hat’s shape.
Drying: Air dry the hat flat. Avoid wringing it out, as this can warp the shape.
Storage: Store the hat in a cool, dry place. Avoid direct sunlight and moisture to prevent damage.
Following these tips will keep your crocheted baby hat in pristine condition, making it a lasting keepsake.
Troubleshooting Common Issues When Crocheting Baby Hats
As you embark on learning how to crochet a baby hat, you might encounter some common issues. Here’s how to tackle them effectively:
Hat Comes Out Too Big or Small: This often happens if your gauge doesn’t match the pattern’s recommendation. To fix this, adjust your hook size or tension to get the correct gauge.
Stitches Are Not Even: Consistency is key. Practice maintaining an even tension throughout your project. If a stitch looks off, don’t hesitate to undo it and try again.
Hat is Twisting: If your hat’s brim is twisting, it could be due to crocheting too tightly. Loosen up your stitches, and ensure you’re not pulling the yarn too hard.
Seams Are Noticeable: To make seams less visible, try using the ‘join as you go’ method or work in continuous rounds instead of joining each round.
Hat is Curling Up: This might occur if you’re not crocheting in the round correctly. Make sure you’re not skipping any stitches and that you’re following the pattern accurately.
Difficulty Following the Pattern: Patterns can be complex. Break it down row by row or round by round. Use stitch markers to help you keep place.
Selecting the Wrong Yarn: The yarn’s texture and weight affect the hat’s size and fit. Always choose the yarn recommended in the pattern or one with similar properties.
By facing these common crochet challenges head-on with the provided solutions, you’ll be well on your way to creating beautiful baby hats that are just the right size and shape.